DAX has no duration type, nor a built-in format string to display a duration as days, hours, minutes and seconds.
When the duration is less than one day, an easy solution is to set the column Data Type in the Data View to Time, and then select the Format (hh:nn:ss)

This displays the duration in hours, minutes and seconds as hh:nn:ss (it’s “nn”, since the format “mm” is used for the month)
The problem with longer durations is that when it is more than one day, the days are lost and only the fractional part of the day is shown.
We can see it by entering a duration of 1.5 days, that is shown as 12:00:00, that’s 12 hours instead of 36.

Therefore, in order to display a duration longer than one day, we have to write some DAX code.
The first option is to use the FORMAT function with a custom format string, like for instance “000:00:00:00”. This format string displays a 9 digit number adding the colon as a separator between groups. But writing some code is required in order to build the 9 digit number. The following is a straightforward implementation for a calculated column:
Formatted Duration =
VAR D = T[Duration]
VAR DD = INT(D)
VAR HH = INT(MOD((D * 24), 24))
VAR MM = INT(MOD((D * 24 * 60), 60))
VAR SS = INT(MOD((D * 24 * 60 * 60), 60))
RETURN
FORMAT(DD * 1000000 + HH * 10000 + MM * 100 + SS, "000:00:00:00")
This works, but this code has to be replicated per each column or measure representing a duration.
This is where the calculation groups come into play: if we implement a calculation group to do the formatting, we can write it once and use it in combination with any existing measure.
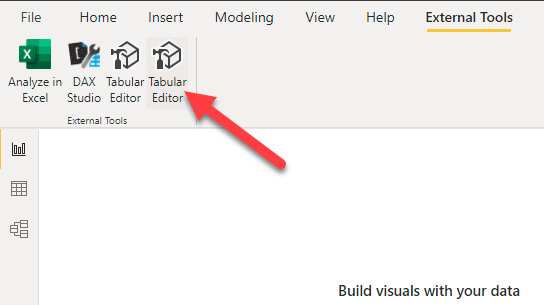
Creating a Calculation Group in Power BI requires Tabular Editor, that can be launched from the External Tools ribbon in Power BI (yes, I have 2 icons of TE in my ribbon: usually only one is installed)
Then using the context menu over the Tables folder we create a new Calculation Group

and we give it a meaningful name. I chose “Duration Formatter”

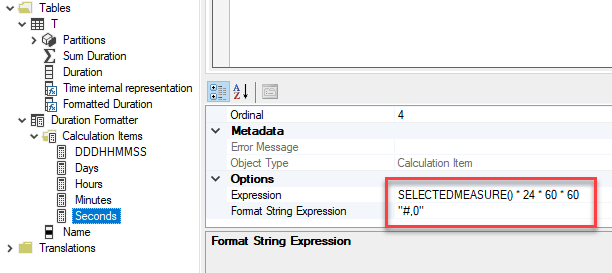
Then using the context menu over the newly created Calculation Group we can create a new Calculation Item
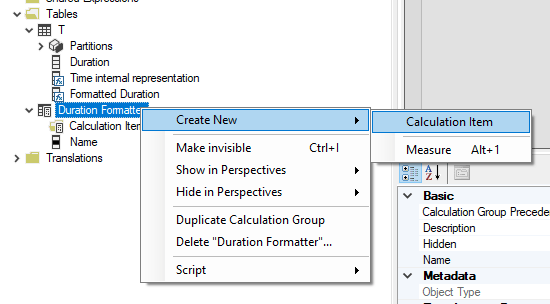
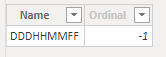
I named it “DDDHHMMSS” and then I wrote the same DAX code as before, just replacing the column reference with the SELECTEDMEASURE() function, and moving the custom format expression to the Format String Expression property
VAR D = SELECTEDMEASURE()
VAR DD = INT(D)
VAR HH = INT(MOD((D * 24), 24))
VAR MM = INT(MOD((D * 24 * 60), 60))
VAR SS = INT(MOD((D * 24 * 60 * 60), 60))
RETURN
DD * 1000000 + HH * 10000 + MM * 100 + SS
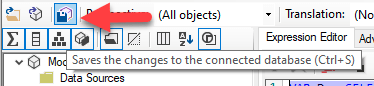
Since Tabular Editor does not synchronize automatically the model to Power BI, we need to save the changes to Power BI by clicking on the Save button in Tabular Editor
Finally we must click on the Refresh Now button that appears in Power BI

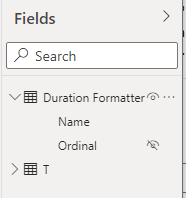
The calculation group can now be seen in Power BI as a table in the data view
To check that the calculation group is working correctly, we can implement a measure
Sum Duration = SUM(T[Duration])And then use it in a matrix, with the calculation group on the columns

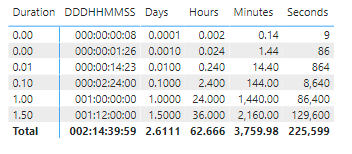
It works! We can now add new Calculation items, to also format the duration as a decimal number representing, for instance, the number of days, or the number of hours, and so on.


Now the matrix with the full CG looks like this

There is a left alignment problem due to the Time data type I set on the Duration column for the first example. But resetting the Duration column data type to “Decimal number” solves the issue.

Of course we are not going to use this CG by replicating the same measure with different formats as columns in a matrix. We are most likely going to choose the format to be used with a slicer. So we can remove the CG from the matrix column and create a Slicer instead.
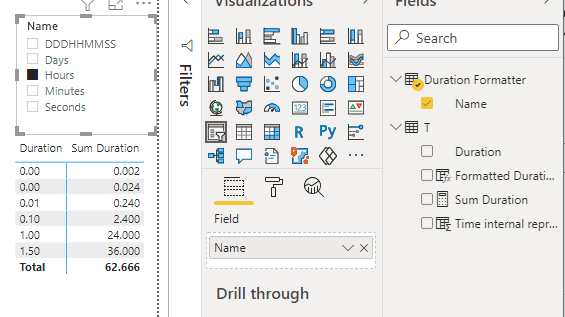
Now we can chose the desired format using the slicer and we can also read the name of the measure instead of the Calculation Item as the column header.
It’s important to know that when selecting two calculation items from the slicer, the CG behaves like when no selection is present.
Wonderful! So everything works fine and we can now use use our Duration Formatter every time a duration requires to be formatted.
No.
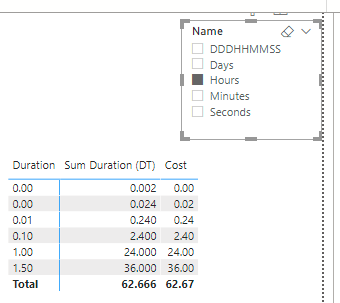
Our new toy is now applied to whatever measure happens to be used in our report. For instance, let’s add a measure that calculates a cost, like for instance 1$ per hour
Cost = [Sum Duration] * 24 * 1When we add this measure to the matrix it gets formatted as if it were a duration.

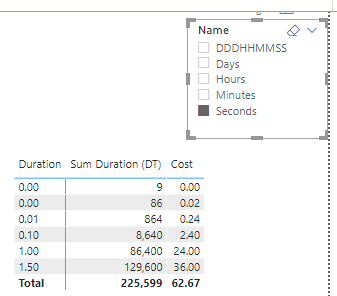
To make the CG only format the duration type measures we must change the code by adding a check on the selected measure name. This can be done by searching a substring that states that the measure represent a duration. For instance we can add the “(DT)” suffix to our measure names and then check for its presence using the SEARCH DAX function.
So I changed the measure definition to
Sum Duration (DT) = SUM(T[Duration])And the calculation item DDDMMHHSS to
IF (
    SEARCH ( "(DT)", SELECTEDMEASURENAME (), 1, 0 ) > 0,
    VAR D =
        SELECTEDMEASURE ()
    VAR DD =
        INT ( D )
    VAR HH =
        INT ( MOD ( ( D * 24 ), 24 ) )
    VAR MM =
        INT ( MOD ( ( D * 24 * 60 ), 60 ) )
    VAR SS =
        INT ( MOD ( ( D * 24 * 60 * 60 ), 60 ) )
    RETURN
        DD * 1000000 + HH * 10000 + MM * 100 + SS,
    SELECTEDMEASURE()
)
I also added the test to the Format String Expression property as follows
IF (SEARCH("(DT)", SELECTEDMEASURENAME(), 1, 0) > 0, "000:00:00:00")Adding the same test to every calculation item, we are eventually able to use a matrix with both a duration, formatted according to the slicer selection, and a cost, formatted as a decimal number.


Of course a different format string can be used instead of “000:00:00:00”, for instance the format string “000\D\a\y\s 00:00:00” adds the word “Days” after the first three digit group.
References
The article Controlling Format Strings in Calculation Groups on sqlbi.com
The Calculation Groups articles index page on sqlbi.com
The Supported custom format syntax documentation page on microsoft.com
Downloads
The sample file for this blog post can be downloaded from my github repository
